Emulator
After verifying the UI in the Previewer, run the application on an emulator or physical hardware. The emulator works the same way on Windows and macOS. If you're unsure which one you need at a given point, see the comparison below.
The virtual devices downloaded through DevEco Studio's Device Manager are HarmonyOS images. Use them for a HarmonyOS project with a matching API and release type. To run a project configured with runtimeOS: "OpenHarmony", use the Oniro emulator or an OpenHarmony device instead.
Previewer vs. Emulator
Both let you see and interact with your app without physical hardware, but they solve different problems and are not interchangeable.
At a Glance
| Previewer | Emulator | |
|---|---|---|
| What it is | A live rendering of a single ArkUI page, inside the IDE | A full virtual HarmonyOS device |
| Startup time | Near-instant after the first compile | Seconds to a couple of minutes to boot |
| Update speed | Reflects most edits within a second or two on save | Requires a rebuild and reinstall to pick up changes |
| Scope | One page's build() method at a time |
The whole app, including navigation between pages and abilities |
Runs your EntryAbility lifecycle |
No | Yes |
| Native code / platform APIs | Not available (sandboxed renderer) | Fully available |
| Network, filesystem, sensors | Not reliably reflected | Network and filesystem available; sensors available, including pace tracking, light, and heart rate (on wearables) |
| Multi-device comparison | Several device profiles side by side, in one view | One virtual device per running emulator instance |
| Disk/resource cost | Negligible | About 2 GB per downloaded system image, about 12 GB to run it |
| Covered in | Previewer | This page |
When to Reach for Each
Use the Previewer while iterating on layout and styling — adjusting padding, colors, component structure, or @State initial values. It gives feedback almost as fast as you can save the file, which makes it the right tool for the bulk of day-to-day UI work. See Live Updates and Multi-Device Preview.
Use the Emulator once you need to verify something the Previewer cannot simulate: navigation between pages, ability lifecycle callbacks, permission prompts, background tasks, real network/file/sensor access, or animations and gestures. It is also the only option for debugging or profiling, since the debugger and profiler can only attach to an already-running app process — see Debugging.
Interactive Preview Is Not an Emulator Substitute
The Previewer's Interactive Preview mode lets you click, tap, and scroll inside the rendered page, which can feel similar to running the app. It only exercises the current page's own state, though — it does not launch your EntryAbility, and it cannot represent flows that span multiple pages or abilities.
Warning
As noted in When to Stop Trusting the Previewer, the Previewer is a productivity tool, not a substitute for testing on a real target. Always validate on an emulator or physical device before considering a feature done, especially anything touching permissions, sensors, background tasks, or performance.
Prerequisites
- Hardware virtualization must be enabled — Intel VT-x / AMD-V on Windows (usually a BIOS/UEFI setting). Apple Silicon (ARM) Macs run the emulator natively.
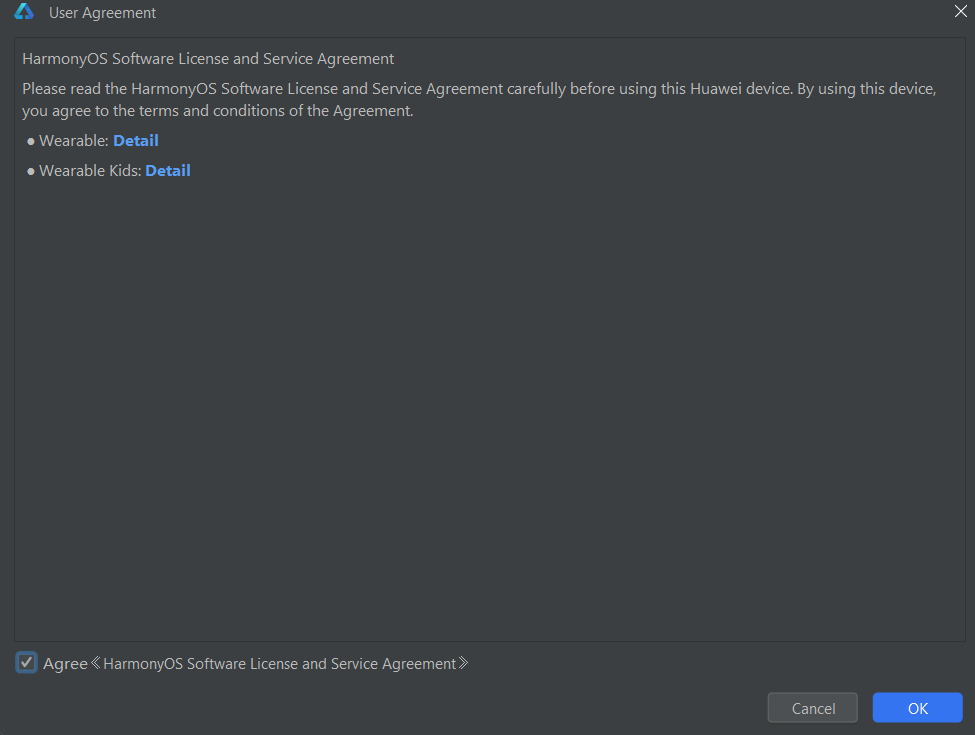
- The first time you download a virtual device image, DevEco Studio shows an additional User Agreement dialog for the HarmonyOS Software License and Service Agreement that you need to accept.
Warning
DevEco Studio's emulator isn't available on Intel-based Macs.
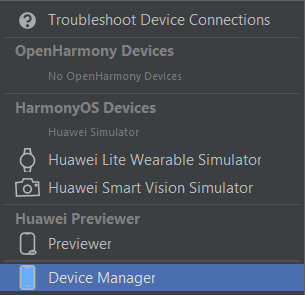
Device Manager
Open Device Manager from Tools → Device Manager or from the device menu next to the Run and Debug buttons on the toolbar. It appears at the bottom of that menu.
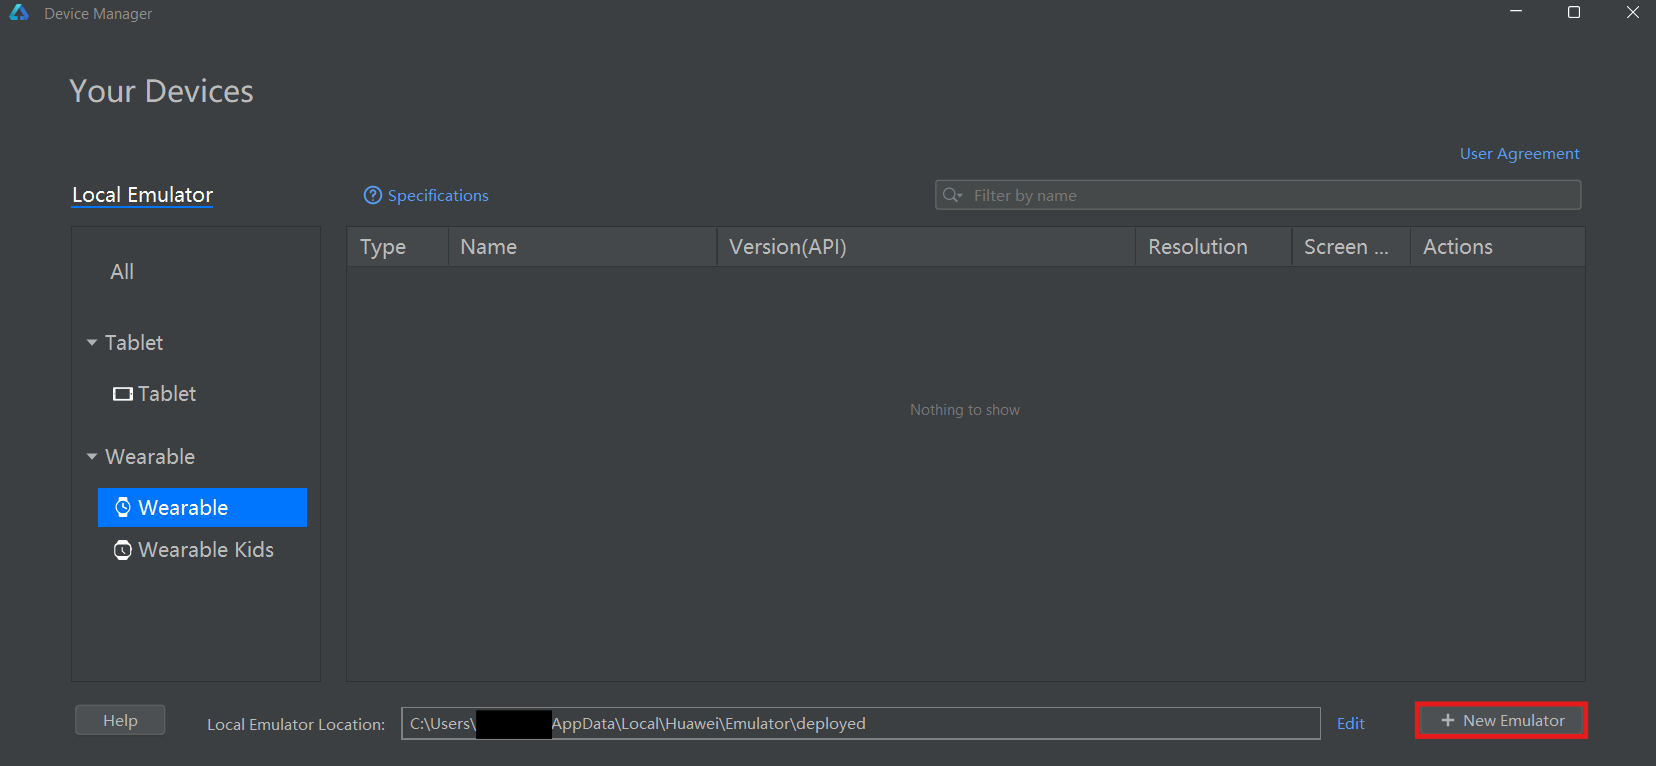
Device Manager's Your Devices page lists existing emulators under the Local Emulator tab, along with their locations on disk.
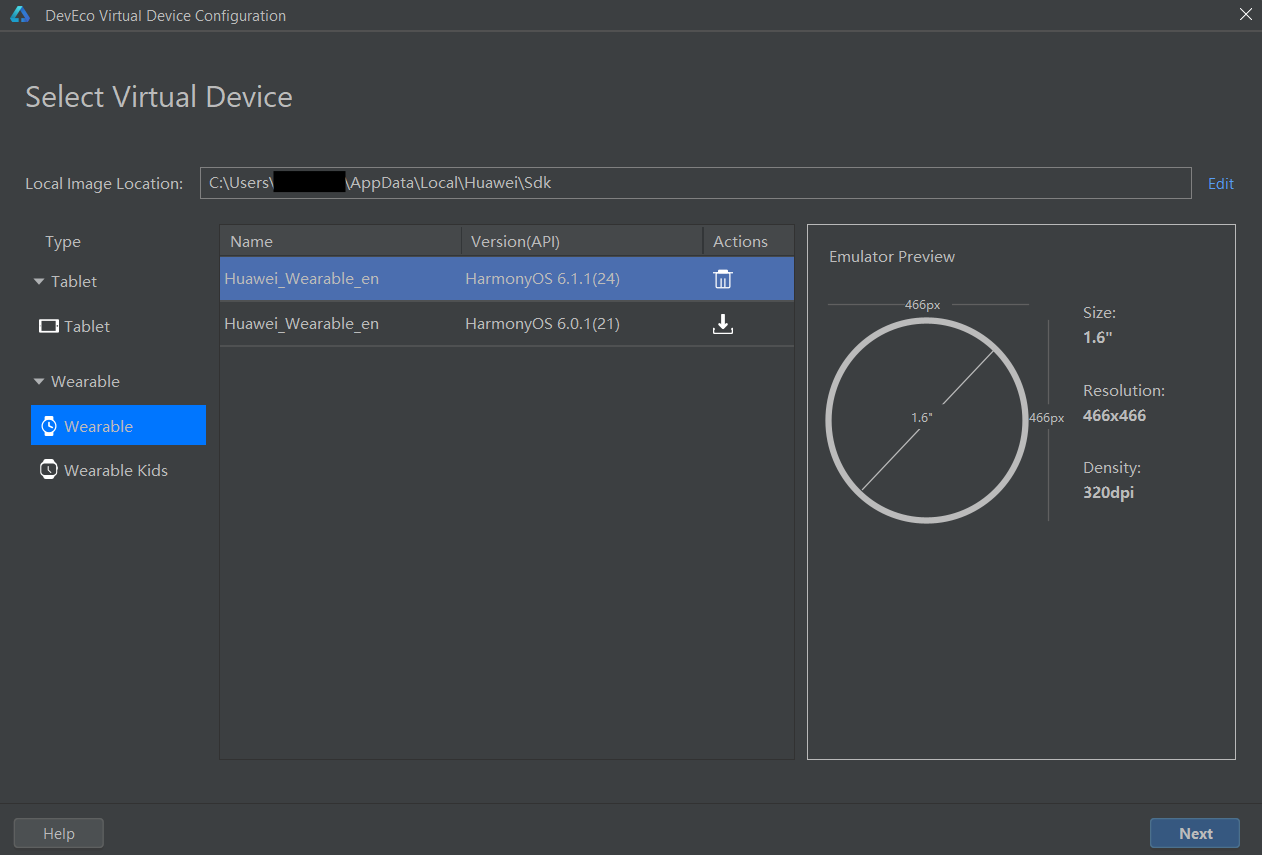
Creating a Virtual Device
- Click + New Emulator.
- On the Select Virtual Device screen, select a device type from the tree on the left (Phone, Foldable, WideFold, TripleFold, Tablet, 2in1, 2in1 Foldable, or TV) and a row that matches the target HarmonyOS and API version (see the version/API table in the Environment Setup Guide overview).
- If the system image has not yet been downloaded, click the download icon in the Actions column and wait for the download to finish. Allow approximately 2 GB of free disk space for the image and approximately 12 GB to run it.
- Click Next.
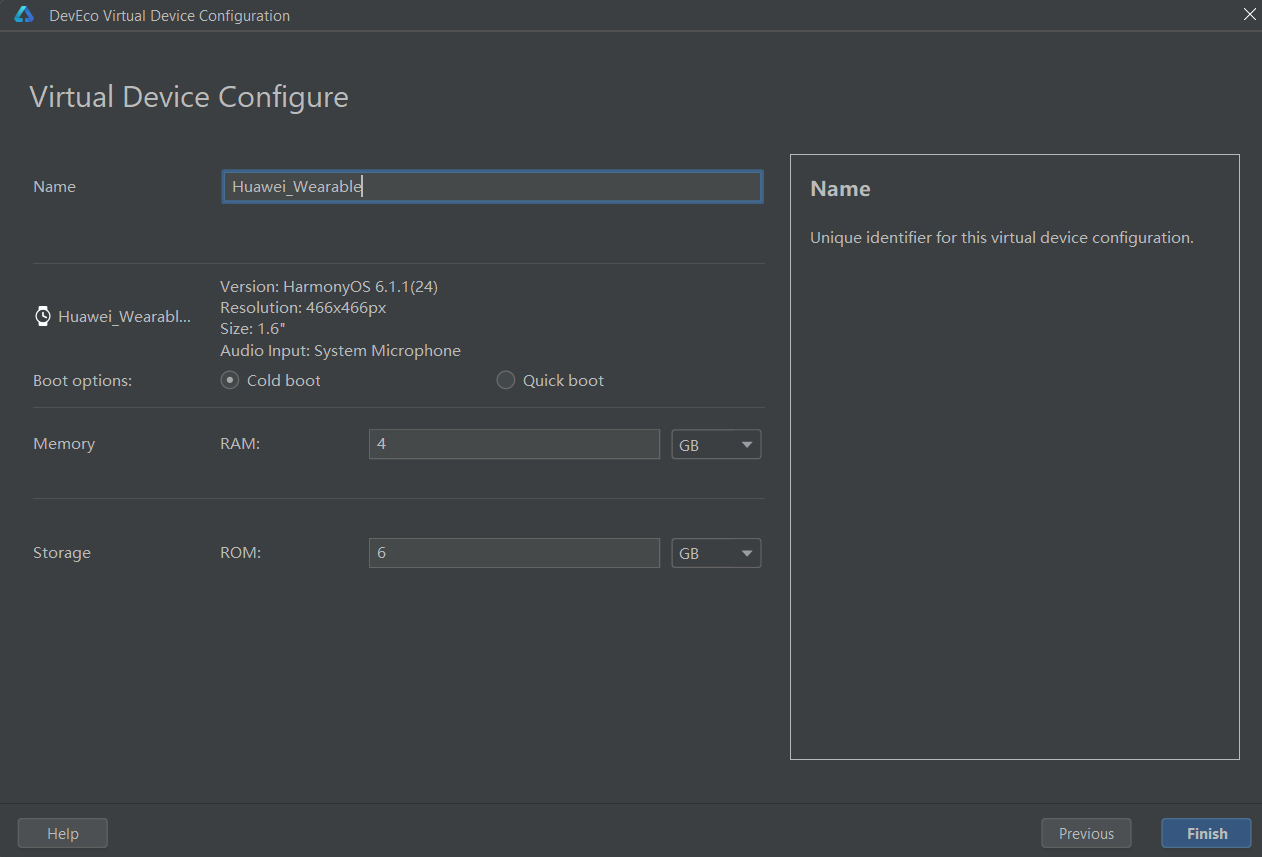
- On the Virtual Device Configure screen, confirm the device name and hardware profile, including the screen size, resolution, and DPI. Click Customize to change the screen profile. Choose a boot option as described below, then set the RAM and ROM allocated to the virtual device.
- Click Finish to create it.
compileSdkVersion vs. compatibleSdkVersion vs. targetSdkVersion
These fields live in each module's build-profile.json5 and are easy to mix up:
compileSdkVersion— the API level used to compile the app. It controls which APIs are available at build time and has no direct bearing on which emulator or device can actually run the app.compatibleSdkVersion— the minimum API level the app can run on. This is the one that actually gates installation: if an emulator's API level is lower thancompatibleSdkVersion, install/run will fail. In most OpenHarmony projects it's set to the same value ascompileSdkVersion.targetSdkVersion— the API level the app is designed and tested against; running on a higher level than this is fine, but the app won't opt into behavior changes introduced above it. This field is mainly a HarmonyOS (Huawei's downstream distribution) addition and isn't always present in plain OpenHarmony projects.
In practice: keep at least one emulator matching (or above) your module's compatibleSdkVersion, so install/run never fails due to a version mismatch.
Boot Modes
- Cold boot — starts the emulator from a clean state every time. Slower, but useful when you need to rule out state left over from a previous run.
- Quick boot — resumes from a saved snapshot, which is much faster for everyday iteration.
If an emulator becomes unresponsive or enters an invalid state, such as the "Unable to Find the BMS Service" problem, perform a cold boot or wipe its data.
Running Your App on the Emulator
- In Device Manager, start the emulator (or let the IDE boot it automatically the first time you target it).
- Return to your project, open the run-target menu on the toolbar, and select the emulator under Huawei|Emulator. The menu also contains the Huawei Simulator entries (Wearable Simulator and Smart Vision Simulator) and the Huawei Previewer.
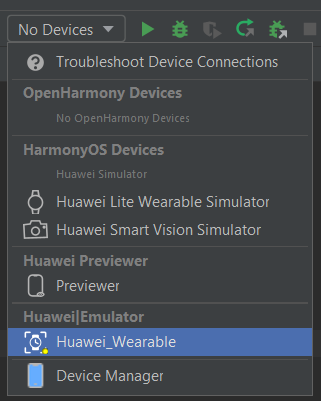
- Click Run. The app builds, installs, and launches automatically on the emulator.
Troubleshooting
- Emulator does not start or displays a black screen — confirm that virtualization is enabled in the BIOS or UEFI settings on Windows. Check whether other virtualization software, such as Hyper-V or VirtualBox, conflicts with it.
- Slow performance — close unused emulators, allocate more RAM/CPU cores to the virtual device in its configuration, and prefer a lower-resolution device profile for quick UI checks.
- System image download stuck or failing — verify your network/proxy configuration and that the selected image is available for your host platform and account region.
- App fails to install on the emulator — see the
compileSdkVersionvs.compatibleSdkVersionvs.targetSdkVersionnote above, and check the app's requested permissions.