Connecting a Real Device
Physical devices generally provide more representative performance and let you test hardware features that the emulator cannot reproduce, such as real sensors, cellular and Wi-Fi conditions, and battery behavior. Connect over USB when the device has a data-capable port, or over Wi-Fi when it does not (or when a cable is inconvenient).
Connecting via USB
- On the device, enable Developer Options (usually by tapping the build number several times in system settings) and turn on USB Debugging.
- Connect the device via USB.
- Accept the debugging authorization prompt on the device the first time it connects.
- The device should now appear in DevEco Studio's target device dropdown in the toolbar.

If the device is not detected, USB power management often causes unstable connections on Windows — try a different port or cable.
Connecting via IP Address (Wi-Fi)
Some devices — wearables in particular, which often have no USB data connection — must be connected over Wi-Fi instead. The computer running DevEco Studio and the device must be on the same Wi-Fi network.
- On the device, enable Developer Options, then turn on HDC Debugging and Debugging via WLAN (naming can vary slightly by device).
- Note the IP address and port shown once WLAN debugging is enabled, for example
192.168.1.42:5555. - In DevEco Studio, go to Tools → IP Connection, enter that IP address and port, and connect.
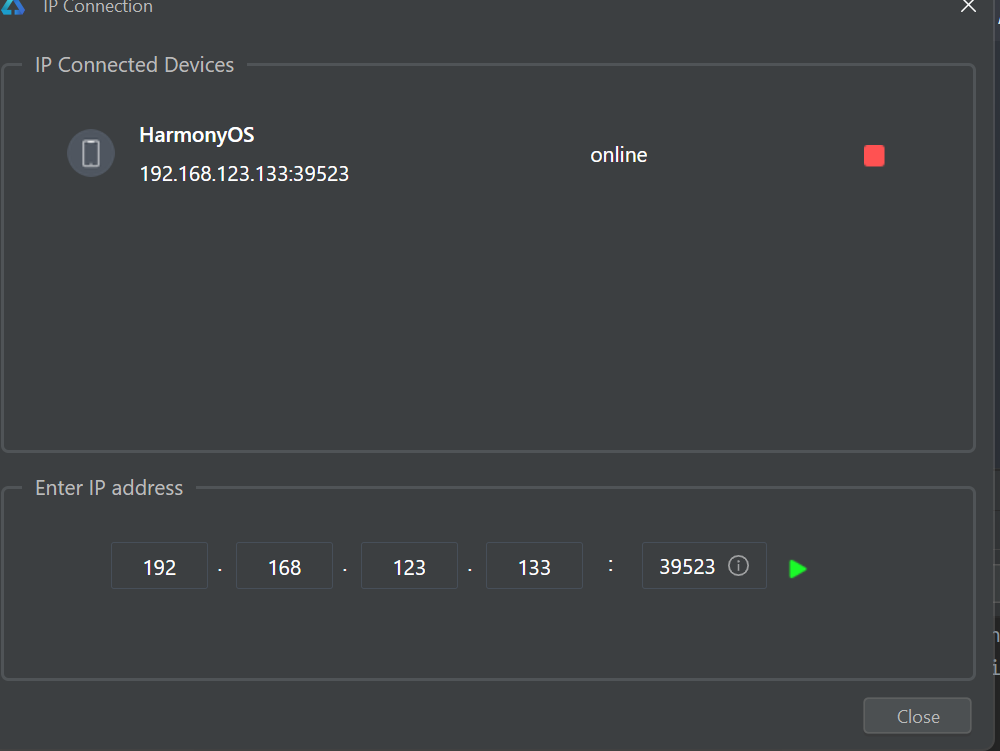
- Once the connection succeeds, the device shows as online and appears in the target device dropdown, the same as a USB-connected device.

Note
You can make the same connection from the Terminal with hdc, without opening the IP Connection dialog:
If the connection fails, confirm the computer can reach the device (ping its IP address) and that both are on the same network segment — a guest Wi-Fi network with client isolation enabled will block it.
Using hdc from the Terminal
hdc (HarmonyOS Device Connector) is the command-line counterpart to Device Manager and is bundled with the SDK installed by DevEco Studio — downloading a separate Full SDK or copying individual executables is not required. Use it to automate tasks or diagnose connection problems outside the IDE, directly from the embedded Terminal tool window.
To use hdc from a terminal outside DevEco Studio, add the SDK's toolchains directory to PATH (the SDK location is shown in Tools → SDK Manager). Depending on the SDK layout, hdc is found under a path such as <SDK location>/<API version>/toolchains (OpenHarmony SDK) or <DevEco Studio>/sdk/default/HarmonyOS/toolchains (bundled HarmonyOS SDK) — keep the hdc executable together with its accompanying libraries.
Verify the installation with hdc -h, then try the following commands:
# List connected devices/emulators
hdc list targets

# Open a shell on the (single) connected target
hdc shell

# Push a file to the device
hdc file send ./local-file.txt /data/local/tmp/local-file.txt

# Pull a file from the device
hdc file recv /data/local/tmp/remote-file.txt ./remote-file.txt

# Install a HAP package directly
hdc install ./entry-default-signed.hap
Multiple targets connected
If more than one device or emulator is connected, use hdc -t <target-id> <command>. Run hdc list targets first to get the identifier. The -s option selects an HDC server endpoint; it does not select a device serial number.
For the current command reference and further USB troubleshooting, see the official HDC documentation.
Before running the app
Installing on a physical device requires a signed build. If you haven't set up a signing configuration yet, DevEco Studio can generate one automatically — see Build Variants and Signing.
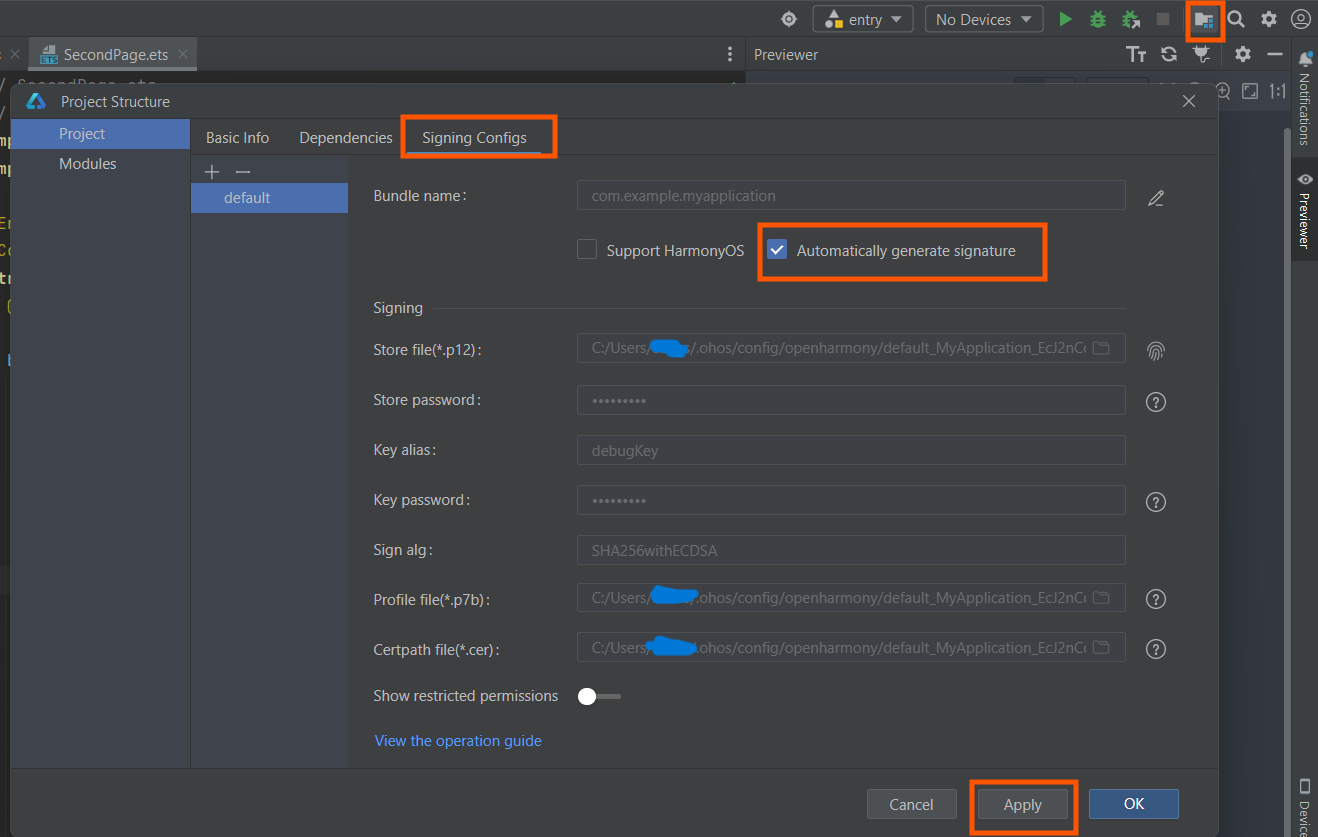
With DevEco Studio set up and a device connected, continue to Create Your First App to build and run your first Eclipse Oniro application.